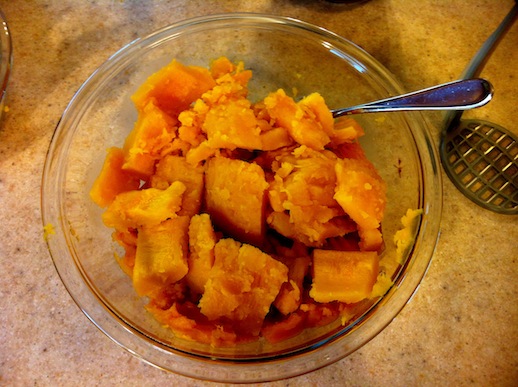
Fall is officially here, and while I'm crazily nesting as we await the impending birth of The Boy, I thought I'd give you a quick overview of how I stock the freezer with pumpkin every fall. Like many other foods of my childhood, pumpkin never came from a can. Because if you can get it fresh, you should buy it fresh.
We took the little Bugaboo on her first pumpkin patch excursion this year. She picked out two "baby pumpkins" and we steamed them at home to use for our Thanksgiving and Christmas pies, breads, muffins and other goodies.
Here's the simple how-to overview for steaming a pumpkin: Cut it up. Get rid of the guts. Throw it in the steamer. Remove the skin. Mash it up. Use it in your recipe in place of canned pumpkin.
For those that like a little more guidance - here's some more thorough instructions.
Step One: Put that canned pumpkin back on the shelf and head to the produce section or the pumpkin farm, where real pumpkin can be found. Pick out one of those little pumpkins, sometimes called pie pumpkins. I have no idea what makes one pumpkin better than the other but I usually go for smooth skin and good orange color. One small pumpkin should give you about two cups or more of pumpkin.
Step Two: Cut off and discard the stem and cut the pumpkin in half. Keep the skin on. Cut the pumpkin up like you would an apple or a melon and scoop out all the nasty guts and seeds in the middle. Try to scoop or slice enough out so that you don't have a lot of strings behind.
Step Three: Put the pieces in your electric steamer. I learned early on that this is way easier than using the pot and steamer basket method. (And cheaper too if you kept burning up pans like I did!)
Step Four: Add water to the steamer, turn it on and let it do all the work. Mine takes about 30 minutes for two small pumpkins. You know your pumpkin is done when the flesh will easily separate from the skin. Stick your fork in and twist a little. It should easily come off of the skin (like in the picture above) and mash up easily. If you find it is still a little tough or crunchy, just give it a couple more minutes to steam. This will also help with the next step if you're (like me) too lazy to get out the blender.
Step 5: Use a fork to slide the pumpkin away from the skin. Throw the skins
away. See how easily it separates when it's thoroughly cooked? Use a potato masher or a fork (or a blender for best results) to mash it all up.
Step 6: I like to measure out how much I need for each recipe before I freeze it. Mom's pie recipe calls for 1 1/2 cups of pumpkin, so that's what I put in each Ziploc container. Then I just stick it in the freezer until I need it.
It tastes so much fresher than the canned stuff and is not that difficult to whip out ahead of time. Then when you need it, it's just as easy to pull it out of the freezer as it is to find your can opener. Tastier too!
 It wouldn't be Valentine's Day without something yummy to eat. We have a weakness around here for the salty/sweet combo. This year, E and I whipped up some dipped pretzels. (Yet another idea from Pinterest.) We used some vanilla-flavored red candy wafers (about $3 a bag from Michael's or Hobby Lobby) and some Valentine's Day sprinkles for a fun and festive treat.