Thursday, July 4, 2013

Happy Fourth!

Happy Fourth of July! We're celebrating here by going bed early. Exciting, I know. But we had an early morning and we have a couple other parties coming up this long holiday weekend.

Check out the fun wreath I made for the front door. Cost about $13 in supplies with enough to make another. I used a straw wreath (keep the plastic wrap on!), some yarn, scotch tape and pre-cut wood stars that E painted white for me. Easy, but a little time consuming to wrap the yarn. The idea came from a few of the flag wreaths and tutorials floating around Pinterest.

Hope you have a fun and festive Independence Day!

Tuesday, June 25, 2013

Cutie Pie Kiddos... and Designing with Clutter in Mind


Remember those photos I mounted last weekend? I got around to putting them up a couple days ago. Honestly they would have sat around a lot longer, but I was worried that some little fingers would mess them up. Nothing like your own sticky kids to motivate you to get things done!

So here they are. Aren't they beautiful? I love how they turned out. You know what else I love? Having the talented photographer Holly Isaacson as my sister-in-law. Seriously I wonder how she accomplishes all that she does, and still has time to take such beautiful photos and run an awesome art blog and still raise three fantastic kids. 

When I put up the frames up above Jonas' changing table in his nursery, I used the toothpaste method I found on Pinterest. A complete and total disaster. Not only did I get toothpaste everywhere (except where it needed to be), but it took me hours to get those photos just right.

This time around, I simply put up paper that matched the frame size (12x12 scrapbook paper) and arranged it how I liked it. Stuck a few nails through the paper that matched the hangars on the frame and we were done. It still took a bit of time with a ruler but overall SO MUCH EASIER.


Now here's the thing about design that really gets to me. When you see all those pretty photos on blogs and in magazines, the rooms are clearly staged. Stylists come in and arrange things just so and then nobody breathes or moves until the picture is perfect. The truth is no one lives like that. There is no way that anyone (at least anyone with kids) has a room that is that clean and that perfect for more than five minutes. And all those crystal or ceramic vases and bowls that are placed all around? Those wouldn't survive a day around here. As much as I hate it, clutter is a way of life. It just piles up.

So as I stared at the paper on the wall, I thought to myself that the photos should be lower. They look too high up and unevenly placed for the space. But then I remembered (actually, I tripped on) all the clutter I had moved to the floor.


If I don't live my life picture perfect like a magazine, why should I place the photos that way? So I decided to hang them with future clutter in mind. That way, when the clutter piles up like it inevitably will, the photos won't be hidden and won't serve as another reminder about how chaotic my life has become. None of us need one more thing staring us down and telling us we don't have our act together. The kids do that for me all on their own. Ha!


So higher up they went, and then the clutter got added back in. (I will confess that I did put some of it away.) Maybe I'm desensitized, but now I kind of like the clutter and how it looks all together. And in reality it's the way I live. It's why I have an office chair around my dining room table, why my coffee table is completely out of reach of the couch and why the vacuum doesn't have a permanent home and yet never gets used. Because it works for us.


That's why I love these photos so much. They remind me of what's important in life. So here's to you, cutie pie kiddos. I love you lots and I hope I always remember that you are everything I hoped for and more. 


Sunday, June 23, 2013

Windows, Windows, Windows

Last weekend I finished and Tom hung up the new valances in the bonus room. When we moved in seven years ago, there were some craaaazy window treatments that came with the house. At the time, I was thrilled just to have something covering all the windows, but I was soon completely unimpressed with the orange corduroy roman shades and heavy gold drapes.  

I updated the downstairs treatments fairly quickly, but it has taken a while to get to the rest of the house. Lately it seems like we've been going crazy for windows. The new bonus room valances are made from the fabric I got on mega clearance at JoAnn's last year year and the inside of the side pleats are leftover scraps from the headboard project. All done for less than $20. Score!

 
I made a similar valance for the kitchen with some fun fabric from Hawthorne Threads. It has a cute baking theme and the aqua stripe along the bottom matches my KitchenAid. The inside of the pleat is a sunny yellow polka dot. It's the kind of pattern that makes me smile when I look at it. I may make something similar for the sliding glass door.


And finally, I've been helping my awesome friend Janet with some window treatments for her house, including new valances for her family room and also a valance for her son's room. For these we used the simple method of stapling the fabric to boards and using hem tape on the bottom. They mount to the wall with simple L brackets. Only minimal sewing - and that was just to seam two pieces together to span her large window.


Lots of impact for not a lot of money. My kind of project!

Friday, June 21, 2013

Take That, You Wascally Wabbits!


(Insert trumpet sound) Presenting our new veggie garden beds! Ta da! Aren't they beautiful?

We've had a problem around here with some pesky little bunnies eating up anything green in the backyard. And now we think we may have a nest of baby bunnies brewing in the back. Lovely.

I've pondered a few different solutions - ranging from tolerating them to calling in the marines - and finally settled on a couple raised garden beds as the most humane and least taxing option.

Here's the before pic of the back of the yard where the garden is...


As you can see, it had become a dried up mess where no one wanted to be, except for a little girl and her shovel.


We used some plans from Ana White (that site is amazing!) and headed to Menards for supplies. The corner posts and a few of the end pieces are actually leftover boards from when we built the deck seven years ago. The rest are cedar fence boards - this is the cheapest way I've found to do it.  Add in a roll of chicken wire and some landscape fabric (or cardboard would likely work too) and you're in business for about $30.

I mentioned the plans to my father-in-law Tom, who loves a good project as much as I do. So he came over one Sunday and we put them together. (And by "we" I really mean Tom, although I did do my best to stand around and look helpful.) Just screw them all together and wrap and staple with chicken wire. It took less than an hour.


Then we had a couple yards of garden-blend topsoil delivered and my hero of a husband helped me by moving most of it to the backyard. I did a royally good job of ordering WAY too much, so kudos to Ben for moving a lot more than he should have had to.


Later in the week, I took a trip to the little garden store around the cornerand bought some plants. We now have tomatoes, cucumbers, green beans, a pumpkin, basil, sage, parsley, lemon balm and dill growing in the back.


I've seen the bunnies visit the new garden a few times, but so far they haven't eaten anything. I also got a bottle of some organic bunny repellent and sprayed the perimeter of the boxes and the plants on the ground. 


I'm looking forward to all the yummy veggies coming in a few weeks!


Friday, June 14, 2013

DIY Canvas Photos


Remember how I said it was time to finally hang some pictures around the house? Well, friends, we are one step closer. Hurrah! This doesn't mean there are actually new pictures hung up anywhere, but it is progress nonetheless.

Thanks to our awesome dining room redo last year, we have a lovely little space for photos on the back wall of the room. Until now, it's been a place for clutter to pile up, with the occasional frame or scrapbook sitting on the buffet.


My problem is that we take too long to decide what pictures to hang, and then it's time for another photo shoot. So we're in this perpetual cycle of indecision and self-imposed waiting. But not this time folks! We got our rears in gear and started the process of beginning the project to put some photos on the wall. (It doesn't sound so impressive when I put it like that, does it?)

Step 1: Order photos. I'm liking the 12x12 size lately and ordered 6 photos from UnitPrints for about $5 each.

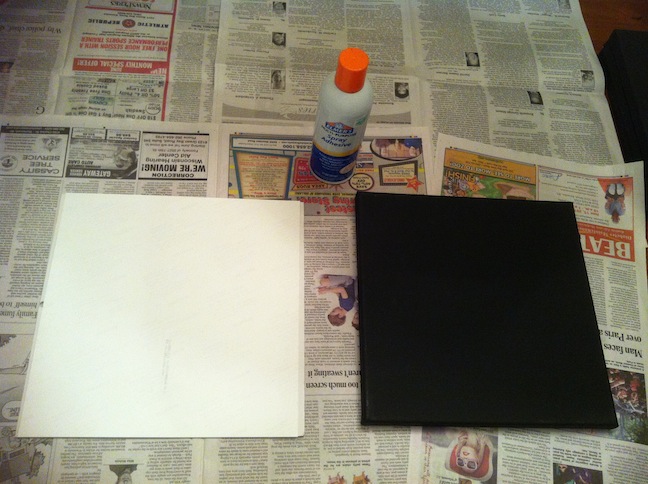
Step 2: Buy the backing for the photos. I debated using foam core, boards, or straight up canvases. Just something other than frames that would make them stand out a bit. And then one day, I'm wandering Hobby Lobby and I come across BLACK 12x12 canvases for $7 each. ($4.20 with a coupon!) See, I was thinking of doing some Pinteresting up in here with the mod podge and the paint and the DIY canvases and all, but let's be honest. I am busy. And lazy. These black canvases eliminate a significant number of steps. This makes me happy.

Step 3: Glue the photos to the canvas. Take some spray glue, spray the back of the photo and place it on the canvas. 

 
This spray glue is nasty stuff and will get ALL OVER. So be careful because there will be overspray. Lots of overspray. And you will be thinking evil thoughts about why you used the stuff in the first place. So do yourself a favor and cover the ENTIRE work surface with newspaper first. Put a new clean sheet of blank, white paper underneath the photo each time before you spray any glue to avoid any newsprint transfer. Change out the newspaper often to avoid a sticky mess. It will get all over your finger tips too and again you will think not-nice things while you scrub it off.


Why then, you might ask, don't I use something else for my adhesive needs? Time and convenience, my friends. I am willing to put up with some sticky newspaper if it means results in seconds and not having to deal with multiple coats of Mod Podge. Again with the laziness.

Step 4: Roll it out. A shout out to Holly for sharing this little trick with me. Take a rolling pin and roll it over the entire photo, paying attention to the edges. This will (I hope!) keep them from coming up in the future. Use a rolling pin that is longer than the photos to avoid any creases in the middle of the canvas. I used a shorter one the first go around (I was too lazy to go downstairs to the basement to get the long one) and now there is a crease on J's head.


As Ben says - if you can't take the time to do it right, you'll have to make the time to do it over. I usually roll my eyes when he says this, but I do see his point here.


So here we have it - six beautiful photos mounted on black canvas and ready to go on the wall. Progress! I love it!

I feel like we need some kind of office pool for when these will actually get put up. Hopefully before the next photo shoot.

Saturday, May 4, 2013

The Summer To Do List

There hasn't been much DIYing going on over here lately. This winter has dragged on and on and on, and all this cooped-up-ness hasn't lent itself to many projects. There are finally a few signs of spring - daffodils, tulips, green grass, oh my! All the fresh air has me dreaming of new projects to tackle this summer.

Plan the Garden Last year, our resident bunny couple ate up pretty much everything in the garden. This year, I'm determined to win the war over these rascally rabbits and send them packing for good. Just don't tell E - I think she's become kind of attached to them. Any and all suggestions are welcome for how to rid our backyard of these pesky wabbits. I think it's going to be June before the garden gets in, but I'm already thinking of what yummy veggies to plant.

Elkhorn Flea Market - this is one of my favorite day trips each year. This HUGE flea market takes up the entire Walworth County Fairgrounds and hundreds of vendors sell pretty much anything antique, handmade or vintage that you could think of. I love wandering through the stalls and coming up with lots of ideas. Last year, I got the dresser in the bonus room and a side table that I plan to sand down and refinish at some point. Add it to the list! This year's dates are May 19, June 30, August 11 and September 29.

Garage Mudroom - I was hoping to have this done last fall before J was born, but it didn't happen. We did buy some stick-on floor tile when it was on sale, but it's still in the box in the garage. I really like this mudroom plan from Ana White and I may just be ambitious enough to give it a go.

Basement Layout - we're starting to think about talking about coming up with ideas for initiating plans to finish the basement. I'm sure it's still a few years down the road, but I would like to at least get an idea of what walls should go where and how best to use the space. First up is figuring out how to get that pesky sump pump to cooperate and stop flooding the basement during heavy rains.

Paint the Upstairs Hallway - I really should stop talking about doing this and just get it done.

Hang Pictures - The walls around here are pretty bare. And now that we have some great new photos from Lily Bella Photography, it's time to get some pictures up on the walls. Has anyone done the DIY canvases that are all over pinterest and would you recommend them?

Finish Window Treatments - another thing I need to just finally finish. Almost there!


Tuesday, March 19, 2013

Milestone Monday!

We've hit a milestone here - this little ol' blog of mine has hit 10,000 page views. Exciting! So thanks to all of you for reading my ramblings and sticking with me through infrequent posts, crazy projects and my sub-par photography. (And I realize it is not Monday as the title suggests, but Milestone Tuesday doesn't sound as great, now does it? And I did think of it yesterday.)

Honestly I've been feeling a bit overwhelmed lately with all the projects that are unfinished around here - the mud room in the garage, the bonus room window treatments, the unpainted upstairs hallway, etc. And did I mention that the basement flooded again? That's the third time in seven years. Ugh. Fortunately we learned our lesson the first time and everything was off the floor or in a waterproof bin. And we caught it before there was too much of a mess.


Lately I've kicked it into high gear and am finally powering through some things that should have been done ages ago. Our bedroom is now painted and has curtains again, and yesterday I finished sewing the kitchen window valance. I'll post pictures once the house is not a complete disaster. Oh yeah, and the valance still needs to be hung up. Lucky you, tomorrow is cleaning day and my handyman (i.e. Bubba) is coming over tonight.


Because I have many projects going on at the same time, one of the ways that I keep everything organized is my house binder.  I like to have all the info about every room handy when I'm out shopping for stuff, because you never know when you'll wonder whether the fabric in the quilt is raspberry pink, bubblegum pink, or pinky pink.

I bought a small 7x9 inch binder from Office Max and some business card inserts and filled it full of paint swatches and fabric samples. Each room has its own page, so it's easy to find what I'm looking for when I need it. I love having everything all in one place!